
For anyone who doesn’t know (and you should really know, I won’t shut up about it), I’m going to the World Championships for Age of Sigmar in November. And I want to do quite well, so the pressure is on for me to practice and train so I can compete at the highest level I can. Part of that is to attend as many tournaments as possible, and to do as well at them as I can. Previously there have been a couple of one dayers, but Goldcon is the first two-dayer.
Naturally, as the first two-dayer I was attending, I was going to be taking it fairly seriously. I had a list that I had a lot of confidence in, and I had been practising with it almost exclusively for the last couple of months. So, I had high hopes and plenty of pressure (purely self inflicted) going in. My goal was a 4-1 or better, and a painting award. Now, achieving either of these would normally be something to be proud of by itself, but I wanted both.
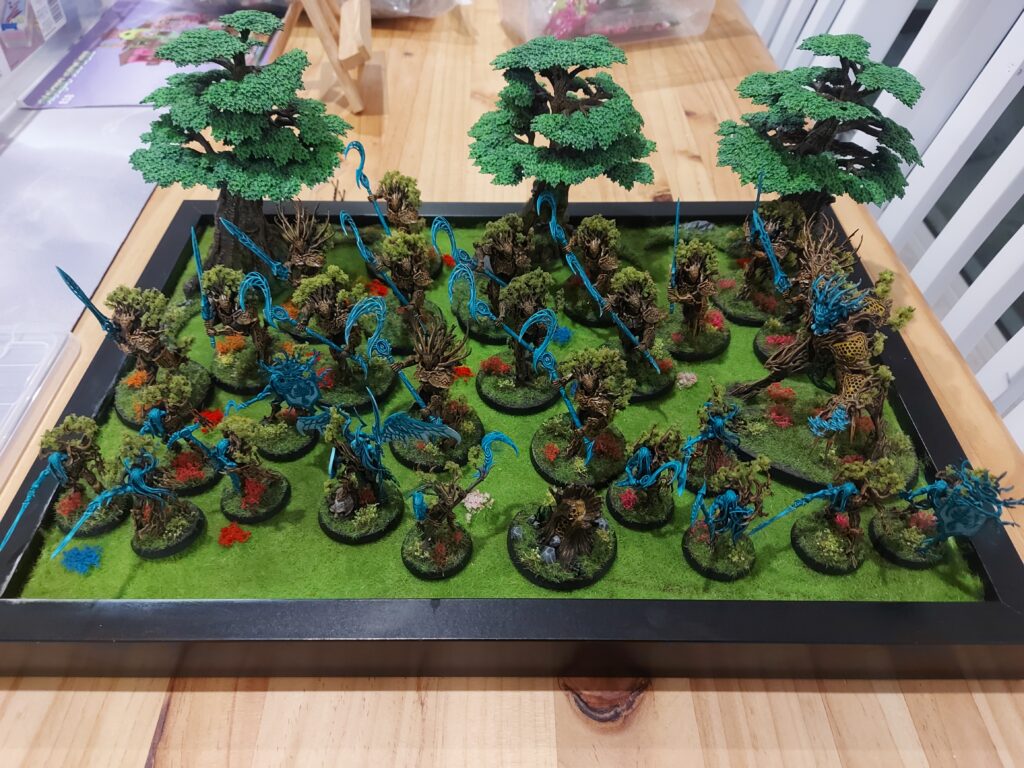
The list I was using was the Sylvaneth army that I had been playing a lot of recently. I think it is very competitive in the current ruleset, and it asks a question that a few of the other power lists don’t really have an answer for. The list was;
Allegiance: Sylvaneth
– Glade: Heartwood
– Grand Strategy: Barren Icescape
– Season of War: The Burgeoning
Leaders
Arch-Revenant (120)*
– General
– Command Trait: Warsinger
Branchwych (110)*
– Artefact: The Vesperal Gem
– Lore of the Deepwood: Verdurous Harmony
Drycha Hamadreth (320)*
– Lore of the Deepwood: Regrowth
Battleline
9 x Kurnoth Hunters with Kurnoth Scythes (750)*
– Reinforced x 2
3 x Kurnoth Hunters with Kurnoth Greatswords (220)*
3 x Kurnoth Hunters with Kurnoth Greatswords (220)*
5 x Tree-Revenants (110)*
5 x Tree-Revenants (110)*
Endless Spells & Invocations
Spiteswarm Hive (40)
Core Battalions
*Battle Regiment
Total: 2000 / 2000
Reinforced Units: 2 / 4
Allies: 0 / 400
Wounds: 116
Drops: 1
Now, it is very much an all-your-eggs-in-one-basket list, but oh boy, what a basket it is! The block of 9 Kurnoth can reliably put out an absolute stack of damage, and it takes considerable effort to remove them. Combo’d with the Arch Rev with Warsinger, a Branchwych bringing them back and speeding them up, Drycha and the Swords as additional threats, this list can put the damage where it needs to go, and can make it stick. Even the Tree Revs have great gameplay as cheap battle tactic scorers, and are flexible enough to be of use in any situation.
The only real threat I’ve found to this list is the hyper mobile gunlines (namely Kharadron Overlords), as I’ve got the mobility to beat the brawling lists, the power to push through mobile lists, and survivability to outlast the alpha lists.
This list was probably the most serious I had run since Cancon, back in January, so I was looking forward to flexing my gaming muscles and checking in to see if I still had what it takes to compete with the top players in Age of Sigmar.
Game 1 – Storm on the Horizon
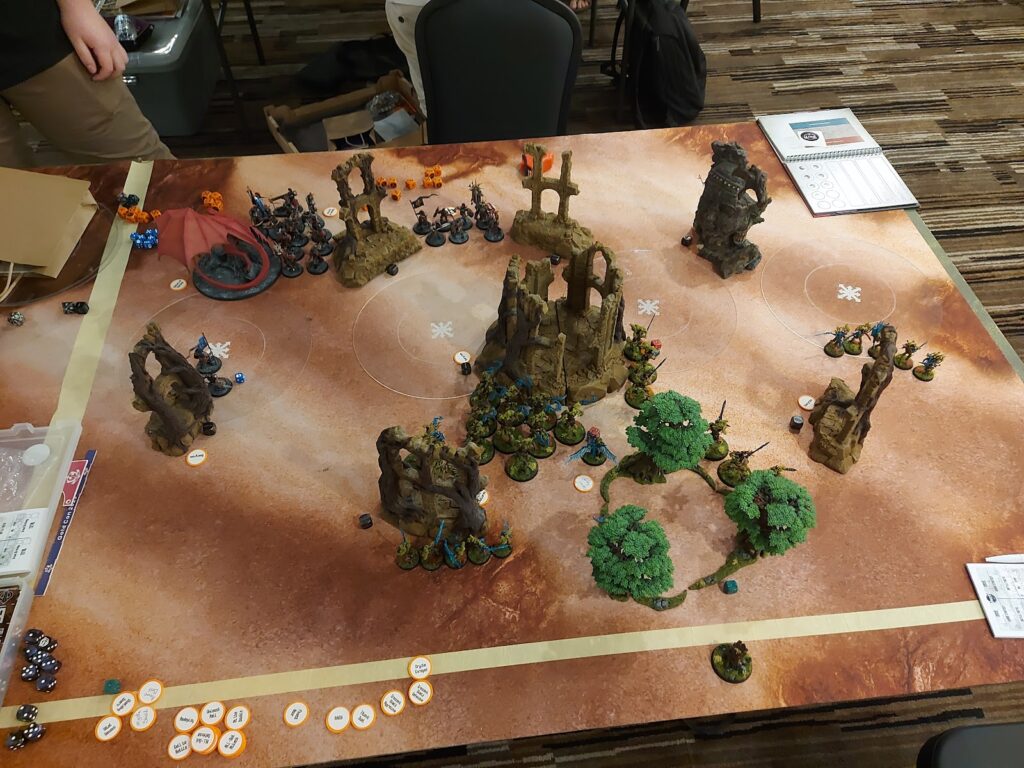
First up was a fellow named Nick, and he was bringing Stormcast Eternals. Specifically he brought Karazai, a big unit of Praetors, a big unit of Longstrikes, and a smattering of heroes to back them up. The mission was Geomantic Pulse, so I was a little worried about his bunker just following the pulse across the table and denying me any good scoring opportunities.

Deployment
We both deployed fairly centrally, while Nick kept some Liberators, an Incantor, and the Longstrikes in the sky. As I was a one drop, I gave Nick the first turn and bunkered down.
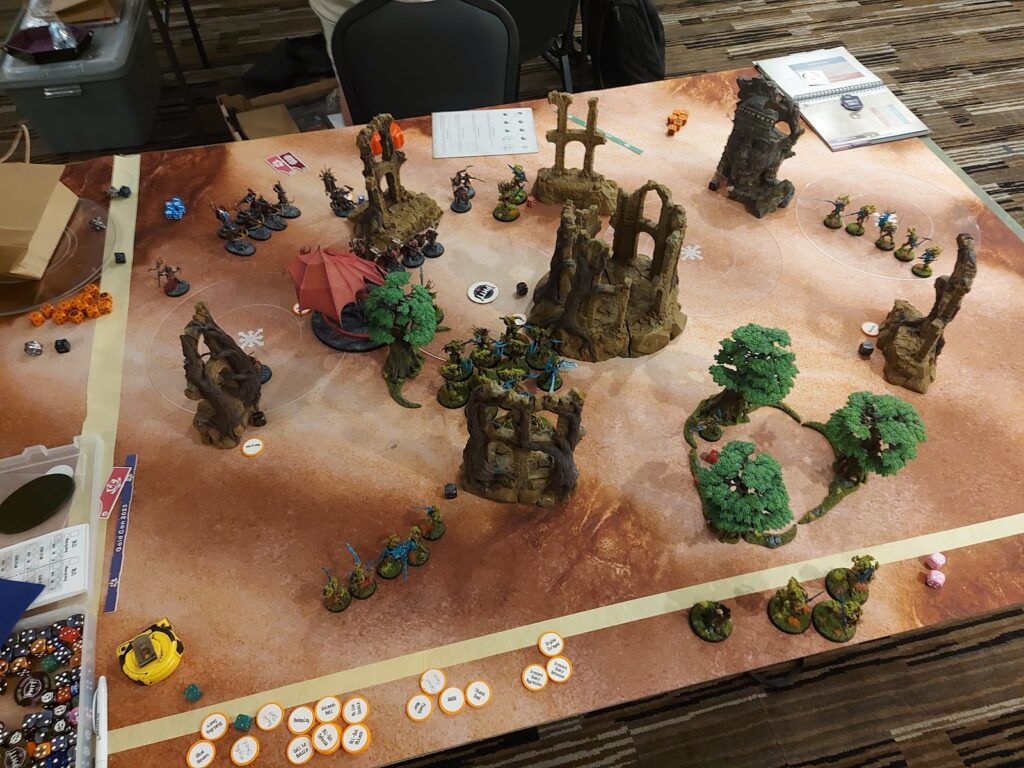
Nick played a fairly defensive turn, just jockeying for position. His Vanquishers ran up to tag one of the centre zones and to shut down my overgrown in the centre of the table, whilst everything else moved or dropped down on my left flank. The Longstrikes took aim at the Scythe unit, and sniped one down. My turn involved bringing the dead Scythe Kurnoth back, and moving out to threaten Nick’s advance units. Drycha put some hurt on the Praetors, before one unit of Sword Kurnoths charged into the Vanquishers in the centre, whilst Drycha turned her attention to the Liberators and Incantor on my left flank. The Swords butchered the Vanquishers, but Drycha fluffed a bit and only killed a couple of the Liberators, and left the Incantor still alive, before fading back to behind my main line.
End of Turn 1
I won the double into turn 2 and decided to take it. Whilst I wouldn’t be able to do any damage to Nick’s main force, I should be able to remove some of his options for later. Drycha managed to get out a forest, but the Spiteswarm Hive was stopped by an Incantor. Everyone moved up around the new forest, with the Sword Kurnoth threatening the backline. Then Drycha once again chipped off a couple of wounds of the Praetors, before repeating her charge into the Liberators and Incantor. Whilst in the centre of the table, the Sword Kurnoth charged into two of Nick’s heroes and some more Liberators. The Sword Kurnoth butchered Nick’s Incantor up the back, whilst Drycha fluffed again into the Liberators and Incantor, leaving everyone still alive.
Nick’s turn two saw Karazai move up and start threatening the centre, whilst his other heroes retreated behind the block of Longstrikes. Again the Longstrikes shot down a Scythe Kurnoth, whilst Karazai flamed them for a bit more damage. Karazai then charged into the Sword Kurnoth and killed all bar one of them.
End of Turn 2
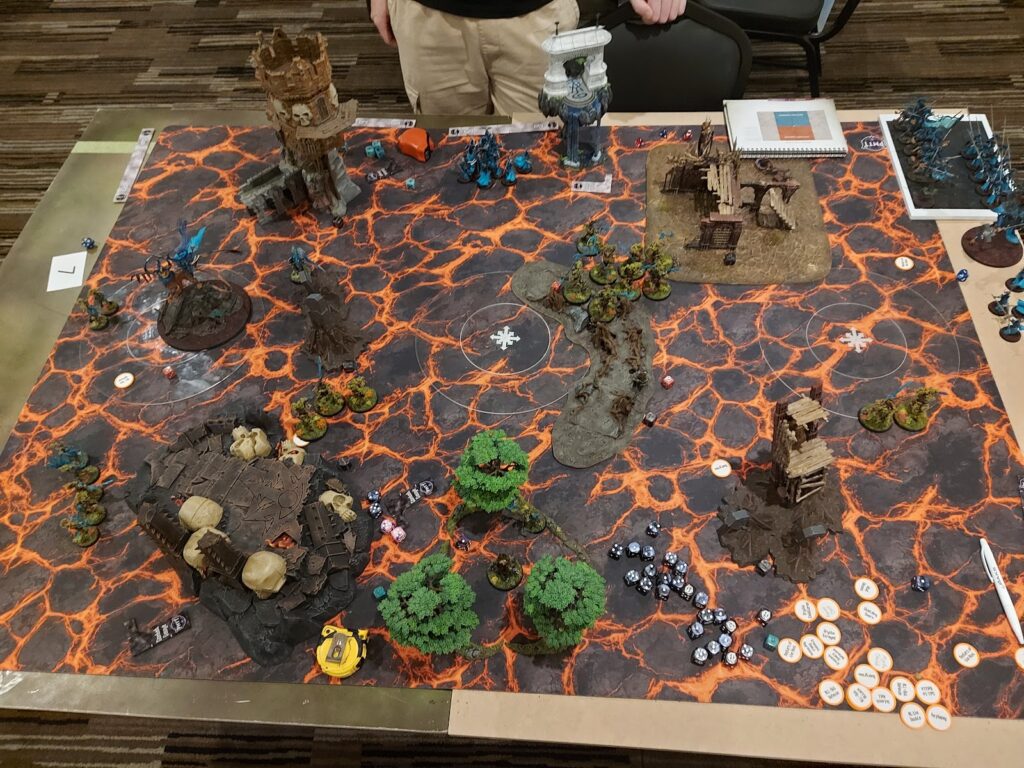
I won priority for turn three, and figured if I could clear Karazai this turn, then the game was going to get considerably easier. The issue was going to be the Praetors. Any damage I put on him, had the chance to be completely negated by them, so they needed to die first. Unfortunately this meant that anything I put into Karazai was going to take a hammering, but that is why I had 9 Scythe Kurnoth. So Drycha shoots, and then charges the Praetors, whilst the Scythe Kurnoth charged into Karazai and the Liberators. To deal with the Praetors, Drycha needs to go first, but manages to wipe them out, but then Karazai retaliates and destroys 6 of the Scythe Kurnoth. Not an ideal situation, I decide to instead dedicate some attacks to dealing with the Liberators, killing them and forcing Nick to use the Call to Aid command to bring them back.
Nick’s turn had one goal, kill the Scythes and free up Karazai. His turn started with the Relictor getting out of dodge, whilst the Longstrikes lined up on the Scythes and dropped another. In the Combat phase, Karazai split his attacks between the Swords and Scythes, and due to some horrendous dice, failed to properly damage either. Even worse, Nick’s bad luck extended out to his save rolls, and Karazai went down to a flurry of Kurnoth attacks.
End of Turn 3
Turn Four started with Nick winning priority, but we quickly rolled it out as he was not looking optimistic about the rest of the game. He went for a play to kill Drycha, but missed out on the needed charge, and as I still had two guaranteed battle tactics, we called it there.
Nick was a fantastic opponent, and a great way to start the weekend. I was a little worried when Karazai did so much damage, but he was always going to be a pain to play against. Hindsight, I should’ve just attacked him first and then faded, as whatever damage I did get through was going to be better than losing so many Kurnoth early. But I got lucky with the next turn’s and scored the win, even with that mistake. Sometimes it’s better to be lucky than good.
Game 2 – The Good, The Bad, and the Beautifully Painted, an Ogor Standoff
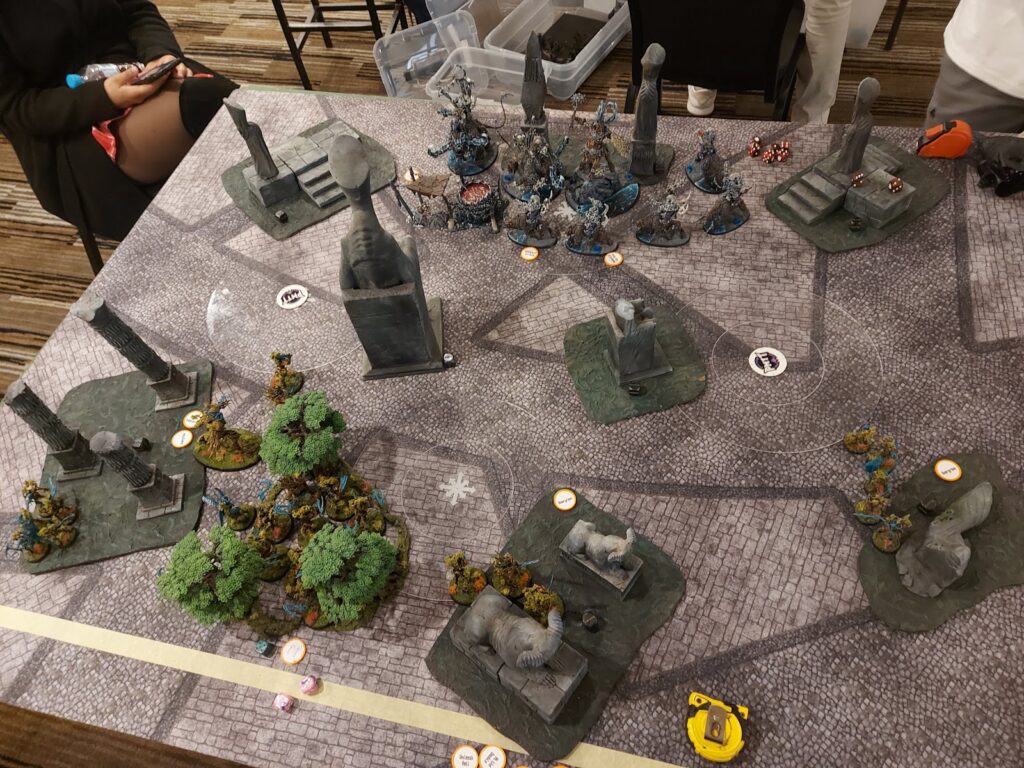
The next round I got matched up against Seth, with his wonderfully painted Ogor Mawtribes. I’ve played Seth once before (he had stormcast back then), and we had a pretty enjoyable game, so I was looking forward to this one. His was list built around a Frostlord on Stonehorn, Kragnos, a Stonehorn Beastrider, and some Mournfang. The mission was Power Flux, so with such linear objectives, I knew I would have to time my offensive perfectly, otherwise I would be run over by the giant rampaging monsters.
We both deployed very centrally, and I gave Seth turn one. I chose to activate the side objectives, to force him to open up his screens, and hopefully make a gap for me to exploit, but Seth was not interested in giving me any opportunity to get to his monsters. He shuffled around slightly, but didn’t give me any opportunity to get a sneaky teleport in. He also didn’t score the objectives, as there was a bigger risk I’d be able to exploit a gap if he did. My turn saw an easy battle tactic, and a subtle move to claim both objectives. Getting me slightly ahead at the end of round 1.
End of Turn 1
Seth won priority for turn two and gave it to me. He immediately switched the objectives back to the centre two, as he didn’t want to risk his board positioning. My turn was quite short, as I just scored a battle tactic, and kept ahead on the points. His turn was, once again, quite short, scoring a battle tactic and some objective points.
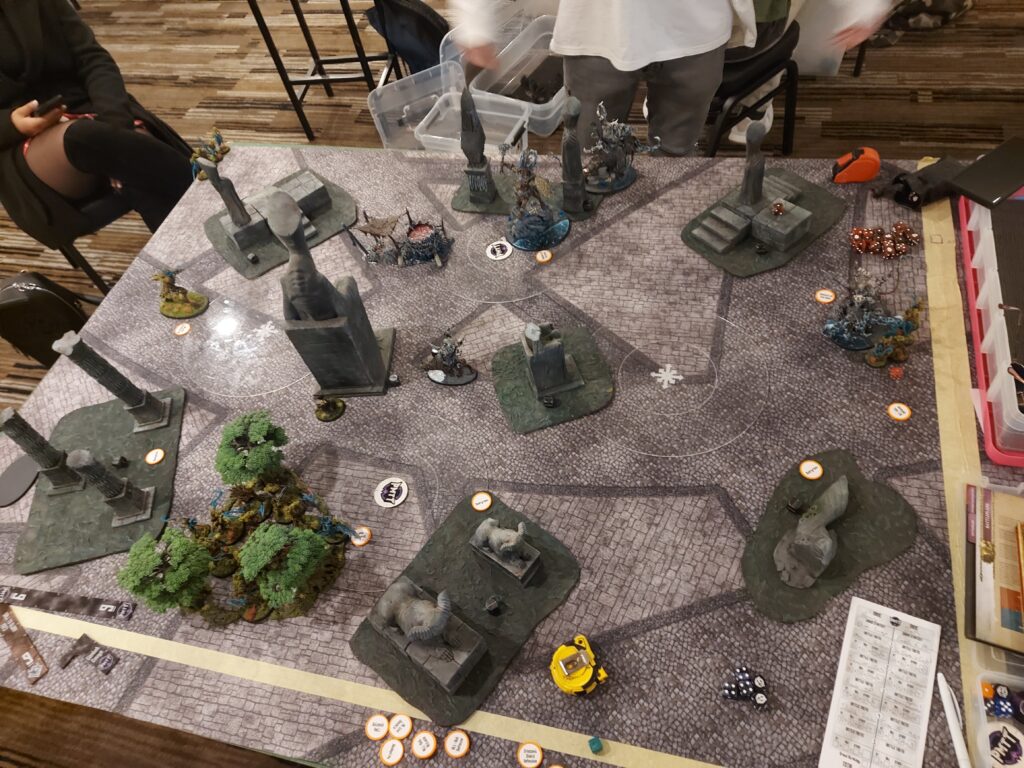
I won the priority for turn three and immediately gave it away. If Seth didn’t open up his bunker this turn, I would get even further ahead on points. He shuffled slightly again, and moved both his Mournfang units out to contest the objectives. A very quick turn for Seth, but he was back in the game. My turn involved both my smaller units of swords being sent out to kill off the Mournfang. The right hand flank did, claiming the objective, whilst the left flank only killed a single one, but took the objective back and put the pressure back onto Seth.
Priority for turn four went to Seth, who gave it away again to switch the objectives back to the centre line. I decided to pull the trigger a bit and threw one unit of Swords forward to try and kill off the Slaughtermaster in the back corner. They were successful, and I managed to finally crack the formidable bunker. Unfortunately for me, now that the bunker itself was under threat, Seth unleashed the full rage of the Stonehorns who had been kept on the leash all game. Both moved over and charged into the Swords at the back, but a massive rampage saw the Frostlord make it over to the Swords on the flank as well. After a quick and brutal combat phase, both units were gone and the Stonehorns were eyeing off their next target.

End of My Turn 4
End of Seth’s Turn 4
Priority for turn five was won by Seth, who gave it to me in an effort to limit my options. After a brief discussion, we figured out that the optimal play for me was to retreat all my models back into my territory, score the objective, and pass the turn, as there was nothing Seth could do to catch up. Another victory for the trees.
This was a really interesting game, as it was the complete opposite to what I expected. We both remarked during the game that this felt more like big-brain chess than Age of Sigmar, and we agreed that it was very much a case of the first person to commit their force would probably end up losing to the counter punch. But getting ahead early let me keep the pressure up, and it was a good reminder that the game is won and lost on objectives, not brutally murdering the opponent.
Game 3 – Bringing a Scythe to a Hammer Fight
Round three was against Corey and his Lumineth Realmlords. I was somewhat worried about his list, as I don’t have a great track record against LRL. He had Teclis, a massive unit of Stoneguard, a Stonemage, a Spirit of the Mountain, some Wardens, and some Dawnriders. I was especially worried about the Stoneguard and Stonemage, as with the combo of buffs they can become a unit that I really can’t get rid of efficiently.
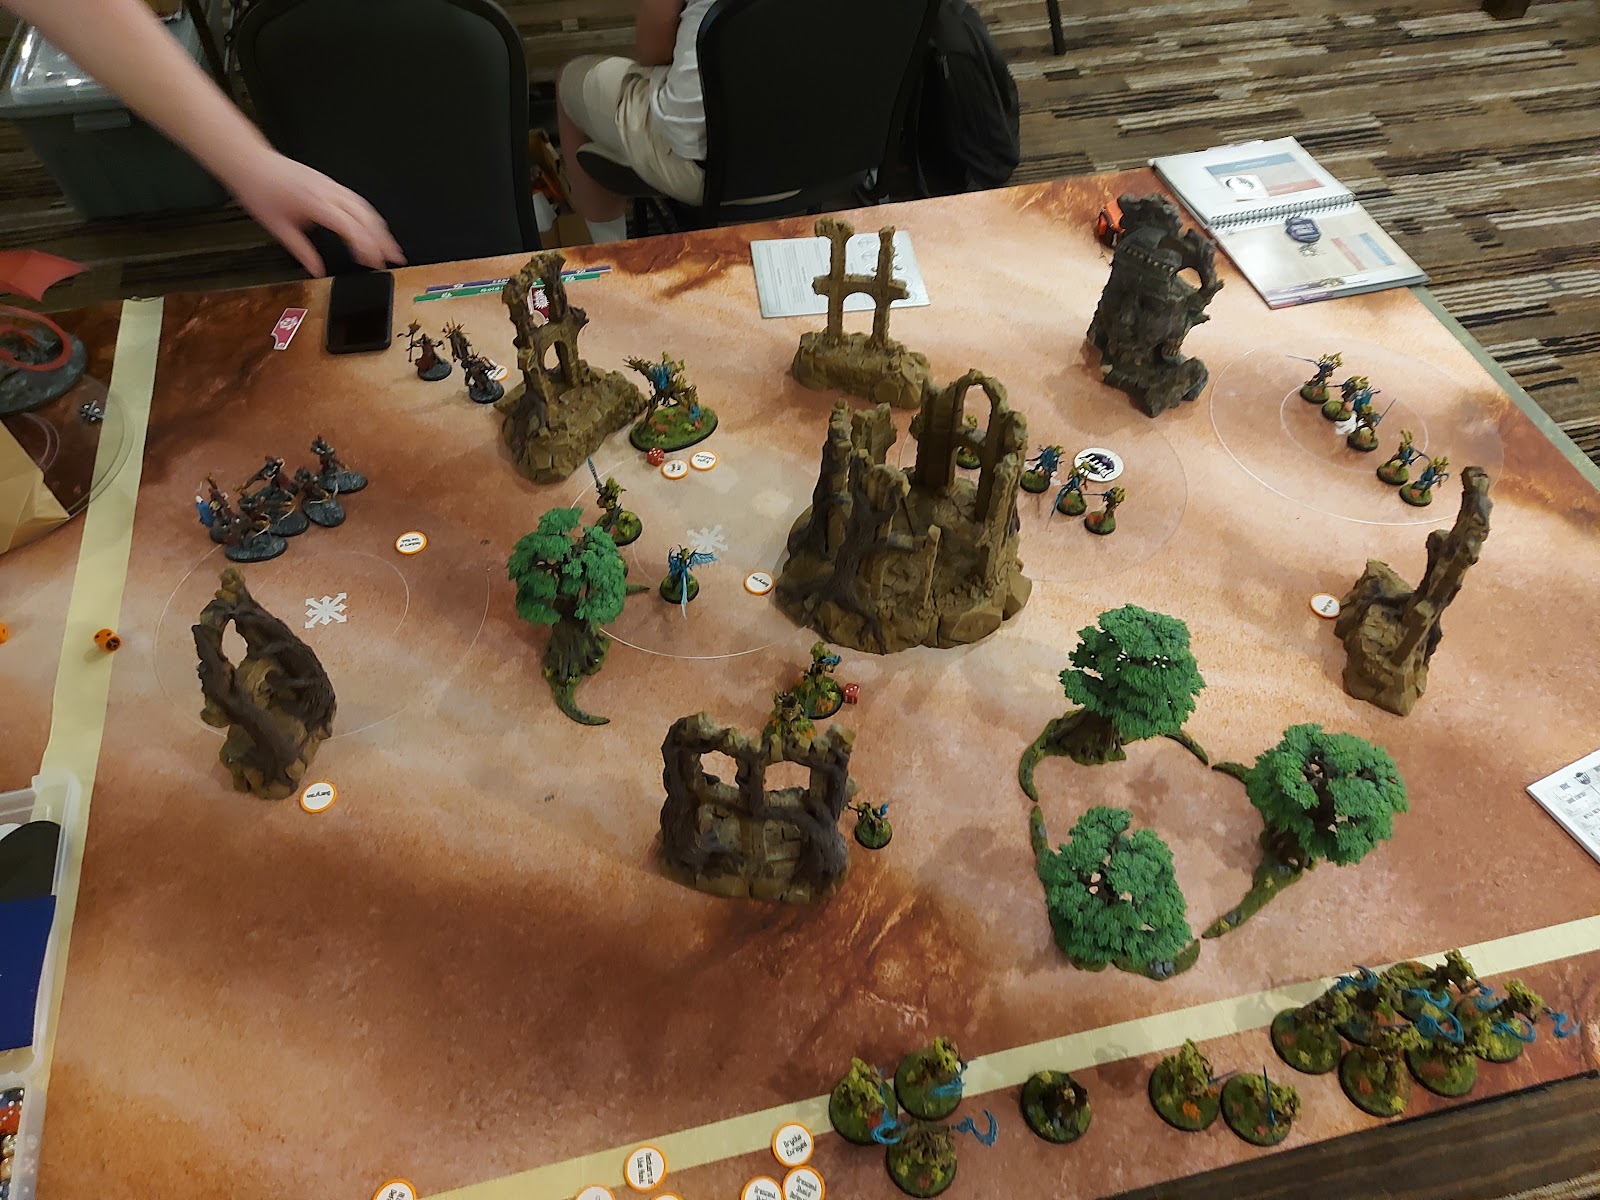
We both deployed quite centrally, and I was given first turn, not ideal, but I did have a crazy idea that I thought might work.
Deployment
My idea was that if I could remove the Stonemage, then the massive unit of Stoneguard is a lot easier to deal with. That in itself is a fine plan, but I would need to commit, and likely lose Drycha in the process.Which was less than ideal, but if I didn’t deal with him early, then Corey would likely make it even harder for me to kill him. So whilst everything else shuffled around, Drycha got loaded up with buffs, and was sent forward to kill her target. I managed to pick off three of the Stoneguard with my shooting, and then made the big charge to get in and around into the Stonemage. After a short combat phase, the Stonemage was dead, and Drycha was right in the middle of it. Corey wasted no time in his turn, immediately going for the Reprisal battle tactic to kill Drycha. Strangely, the Stoneguard retreated from combat, in order to not give up too much board position, whilst the Wardens and Dawnriders moved up to control the objectives. In the shooting phase, a spiky dice roll from Teclis nuked Drycha with a single shot!
I won priority going into turn two, and decided to take it. I figured that if I could remove the Wardens in the centre, and the Dawnriders on the flank, Corey would soon have difficulty scoring the wide objectives. So that was the plan, the Scythe Kurnoth moved up the deal with the Wardens, whilst some Sword Kurnoth ambushed in from the side. With no shooting (now that Drycha was dead), both units made their charges, and while the Scythe Kurnoth easily wiped the Wardens,the Dawnriders, through some good ward saves, held on, only losing two.
End of My Turn 2
Corey’s second turn started out with Teclis casting several of his spells, I managed to stop the double CP one, but his ward save went up to frustrate me further. The Spirit of the Mountain moved over to help the Dawnriders, whilst the Stoneguard continued to pressure the centre. Teclis moved over to support them and really provide some power on my right hand flank. The Dawnrides retreated, making way for the Spirit to charge in, but a timely redeploy and a big dice roll meant that he fell just short and couldn’t wipe out the Swords.
I won priority into turn three, and with the Spirit slightly out of position, I saw an opportunity to take it out. The Scythes made a big charge, got stuck in and killed him off, whilst the Swords and the Tree Revs killed off the last Dawnriders. Corey was quickly running out of pieces to contest with and the pressure was on. His turn saw the Stoneguard charge into the Swords in the centre, whilst Teclis flew away to try and position for next turn. Unfortunately, due to an All-Out Defense, combined with the cover, one of the Sword Kurnoth survived and lived to fight on.
I won priority again to continue, and we both agreed to just talk it out. I had both the Scythes Kurnoth and Sword Kurnoth threatening the Stoneguard, and I still had plenty of pieces left to contest whenever Teclis wasn’t. We made a few key rolls, I threw buckets of primal dice to stop a Teclis spell (which I barely stopped), and rolled out some of the important charges. The game ended with a 26-17 victory to me, which was a solid win to the trees. Corey was a fantastic opponent, and we both agreed that the big play with Drycha at the start just threw a wrench in his plans from turn one. I then very aggressively held onto the tempo of the game, and without him getting a double turn, it was unlikely that his list would be able to take it back.
End of Turn 5
Game 4 – When I get there, I’m gonna hurt you
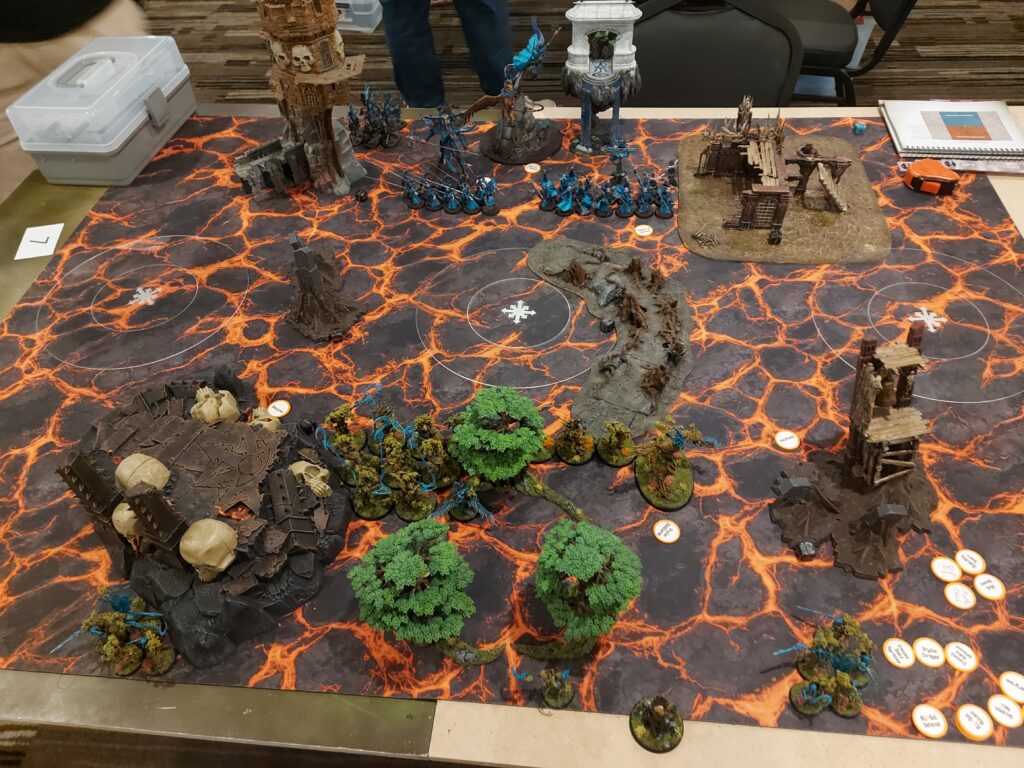
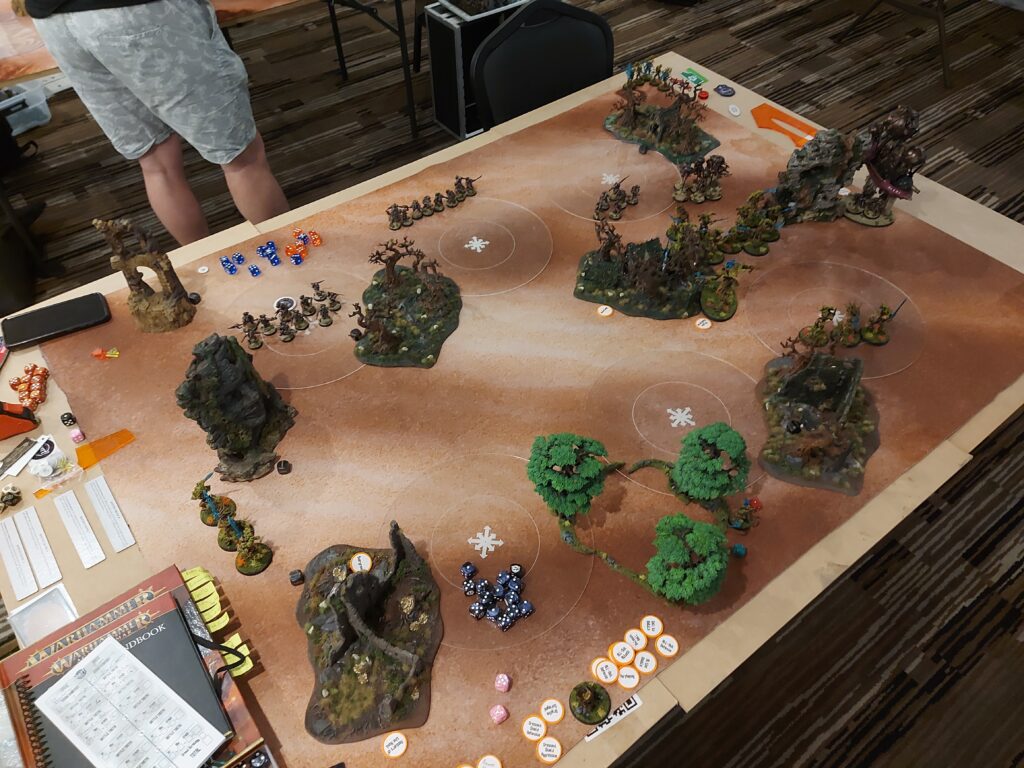
Ending day one with a 3-0 was a good start, but I knew that day two was going to be where the split between the good and the great happened. I was matched up against Tim first up, and his Kharadron Overlords. The big part of his list was two Frigates, both loaded with massive units of Endrinriggers. There were a couple of small heroes as well, and three units of Arkanauts. I deployed very centrally, with the Scythe unit fully within my Wyldwood. Tim went for a reinforced flank, with both Frigates on my right flank, but with Fly High, he would be able to get wherever he needed to. I gave him the first turn, and held my breath to see what he would do.

Deployment
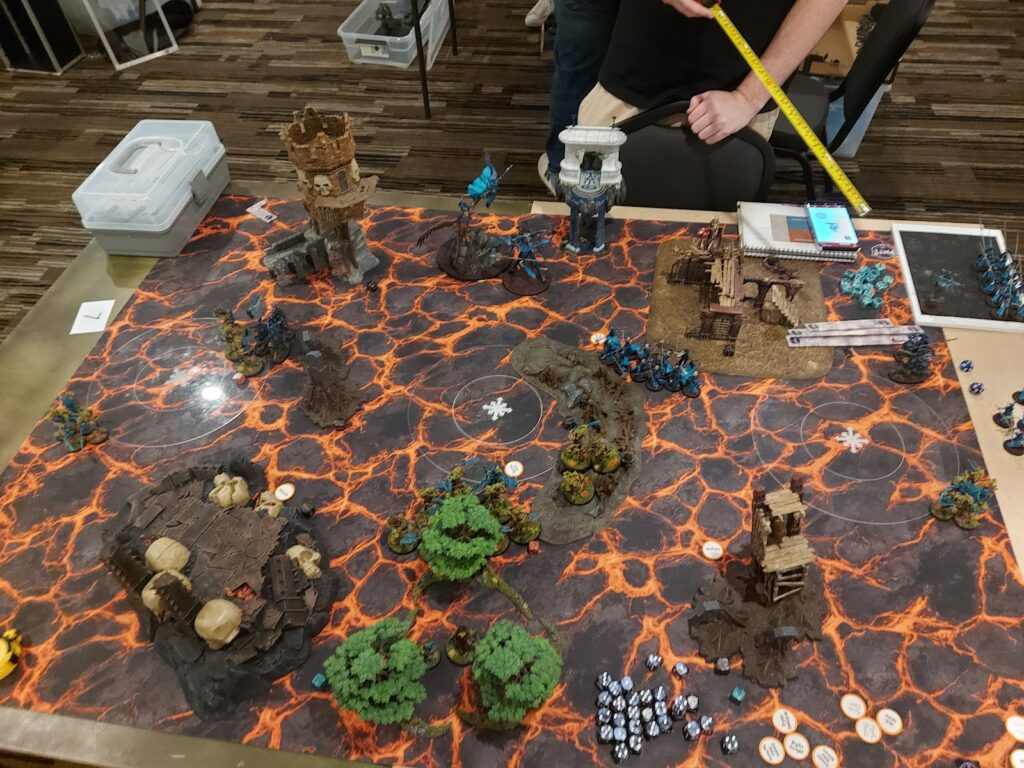
Tim went for an aggressive turn, moving both Frigates forward to wipe out the Tree Revs on my right flank. The Arkanauts spread out to cover their objectives, and then Tim opened up with his firepower. He wiped out the Tree Revenants fairly easily but was out of range to do too much other damage. My turn one involved teleporting the Scythes out, just over nine away from both Frigates, whilst the Arch Rev and Drycha moved up to support. The other Kurnoth spread out to threaten in future turns. Drycha chipped away a couple of the Endrinriggers, and then disaster struck. The Scythe Kurnoth failed their charge and were left standing between both Frigates. This could be bad.
Then I won the priority roll and felt a wave of relief. That wave was quickly followed by another wave of fear, as the Kurnoth were still stuck at half move, so their charge will likely be denied from a redeploy. But I needed to risk it, so they moved up, and Tim redeployed away 3 inches. Drycha moved up to put some more pressure on, whilst the Arch Rev ran into the nearby woods for a bit of cover. Drycha then tried to chip another Endrinrigger but a horrible round of shooting saw almost no damage actually stick. All eyes turned to the Kurnoth, and with a 6 and a 4, they made it into the Frigate. After a short and brutal combat phase, the Frigate was destroyed, and the remaining Edrinriggers and Engineer bailed out.
End of My Turn 2
Tim’s turn two involved a lot of debating about where to move the other Frigate to, whilst the recently unmounted Endrinriggers moved back to deal with the Tree Revenants. The Arkanauts moved around, but were mostly comfortable just chilling on their objectives. Tim decided that he needed to start threatening the other flank, and also didn’t want a repeat of what happened last turn, so the other Frigate flew over to threaten the Branchwych, Sword Kurnoth, and steal one of my objectives. A small shooting phase saw a couple of wounds on the Branchwych and a few dead Tree Revenants. A decent charge from the Endrinriggers saw them ended permanently, with Tim prioritising taking them out to limit my mobility.
End of Tim’s Turn 2
Tim won the priority into turn three and took it. His Frigate was all setup to do plenty of damage this turn, so he dropped off his heroes, and flew over to threaten the other Sword Kurnoths.The Edrinriggers up the back moved up to confront the Scythes, whilst the Engineer moved into the forest to try and hide. After a brutal shooting phase, the Sword Kurnoth were riddled with rivets and removed from the table. Some big charges from the Admiral and Navigator got them into combat with the Branchwych, and they put her in the ground as well. My turn three saw the Kurnoth move forward to try and clear out an objective, whilst Drycha sprinted back to deal with the foot heroes next to my forest. A relatively successful turn, with the Kurnoth wiping the Engineer and Arkanauts, then teleporting back to face off against the Frigate, whilst Drycha had some bad dice, and only managed to kill the Admiral, leaving the Navigator alive.
I won priority for turn four in this exceptionally tight game. I ended up going for a long bomb charge with the Kurnoth which failed, whilst Drycha was fully preoccupied with killing off the Navigator. The remaining Sword Kurnoth teleported through the forests and made the charge into the middle Arkanaut unit, but rolled low and weren’t able to clear them.
Tim’s turn four saw the Frigate teleport nearby to Drycha, whilst the Endrinriggers up the back moved over to confront the Sword Kurnoth. Tim made the charge with the Endrinriggers, but crucially failed with the Frigate, leaving Drycha alive for another turn. The Sword Kurnoth were wiped out, but not before finishing off the Arkanauts.
Priority for turn five came right at the call for only 5 minutes left. We wanted to finish, so we quickly smashed out the last turn. I won priority, and gave it away, in an effort to achieve my grand strategy. Tim’s only real move was to get the Edrinriggers into the middle to deny it, and the Frigate made the charge into Drycha, killing her, and achieving his grand strategy. My turn was short as I rolled out the charge for the Kurnoth, who then wiped out the Endrinriggers, achieving my grand strategy as well.

End of the Game
An incredibly tight game, right down to the wire. Tim took it out 27-24, which we both agreed was an accurate representation of the game. There were multiple points throughout where either of us would have been able to run away with it, if we could pull off the big plays. But it was a fantastic game in the end, even though I was a little disappointed. Tim went on to claim 1st place in the tournament, so losing to the champion softens the loss.
Game 5 – Guns, Lots of Guns.
I bounced back a bit over lunch and was looking forward to the last round of the event. If I could get a win here, I would still achieve the 4-1 I was hoping for, so I was eagerly refreshing the pairings. Then I saw my opponent, and my heart fell. Now, this was nothing against Patty, he is always a pleasure to play against, but because we had played each other at the one day event a week before, and we both knew how this game was going to go. When I got to the table, Patty expressed the same disappointment, as we both knew this game would be decided on a 9 inch charge.
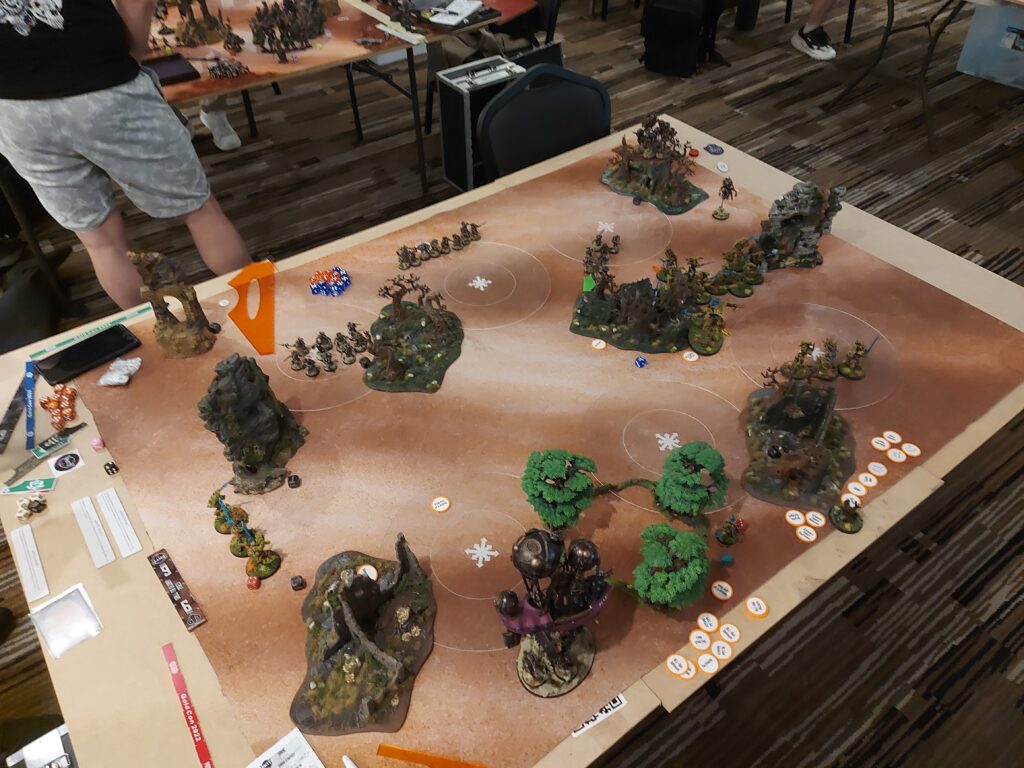
Pat was playing Kharadron Overlords, and his army had guns. He had lots of guns. His list had an Ironclad, two Gunhaulers, a massive unit of Thunderers, and two small units of Endrinriggers. Add in a smattering of small heroes, he was coming locked, loaded, and ready to gun down whatever was put in front of him. In our last game, he had wiped out my big Scythe Kurnoth unit in one turn, so I knew I needed to protect them. I set up the Scythes quite far back, and set up the rest of the army to screen them out. I gave Patty first turn and prayed.

Deployment
Patty’s turn was quick and fast, he moved his Ironclad and Gunhauler (loaded with Endrinriggers) into range on my right flank and started shooting. After the smoke had cleared, he had killed Drycha, a unit of Sword Kurnoth and a unit of Tree Revenants. Not the worst, I still had my Scythes, and if they got stuck in, I would be doing a lot of damage. So that was my turn one. I teleported the Scythes, and then promptly failed the charge.
So turn one didn’t really go to plan, but I won the double, so hopefully I can bring it back. Unfortunately my dice had other plans. The Scythes moved up, and actually made the charge this time, but then my dice decided they had had enough for the weekend. Despite being on 2’s and 2’s, I only manage to put 12 attacks through. And then, Patty made 8 of the 5+ saves. So instead of destroying the Ironclad, I hadn’t even done enough damage to make it stick, as with all of Patty’s healing, it was guaranteed to be full health in his turn. After this fiasco, I decided to call it, and we shook hands.
To be honest, I’m really disappointed with how the weekend ended. There was a small uptick at the end, as I got 3rd place for coolest army, so I was pretty happy with that. But I felt that I just didn’t perform on the table how I wanted. With that being said I need to keep reminding myself that I got literally the only two matchups that I didn’t want, and the games were either ridiculously close, or they were incredibly dicey. And the disappointment had nothing to do with my opponents. Both were absolute gentlemen, especially Patty, as I was really struggling to remain optimistic towards the end of our game. No, my disappointment was entirely self-inflicted, which is something I’ve always struggled with. But, each game, no matter the result, is a learning experience, so I’ve taken my notes, identified what I can do better next time, and hopefully I will do better next time.
Until next time
Henry