
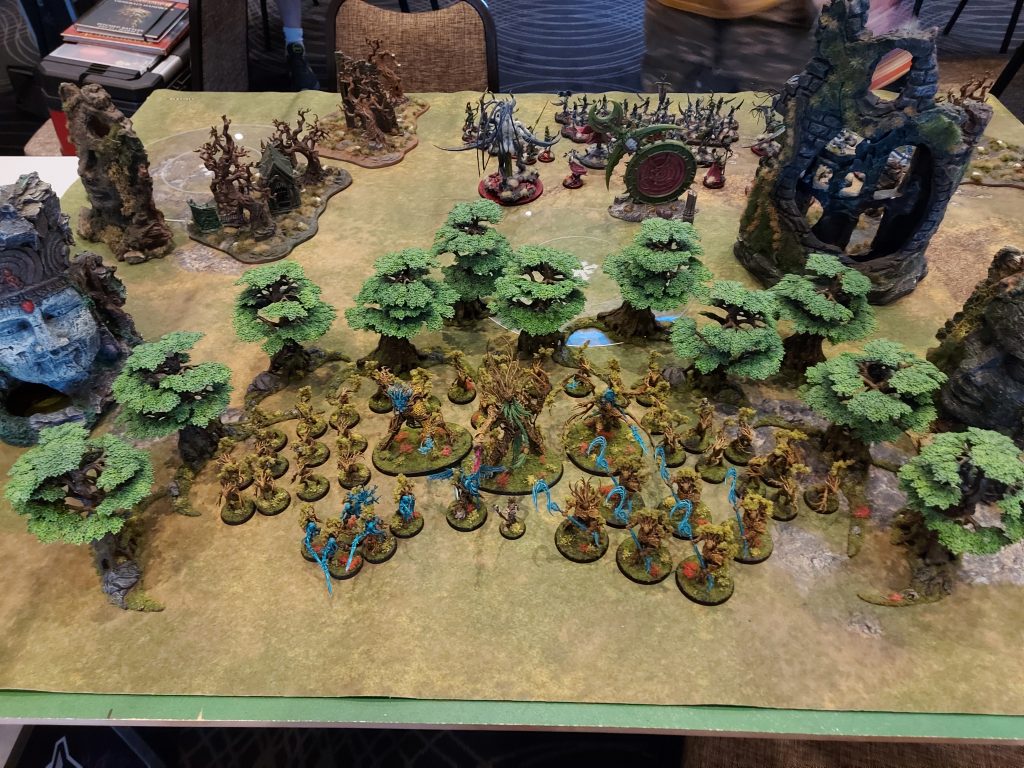
Last weekend (May 6th and 7th), I took my Sylvaneth to their first two-day event, the Mango Meatgrinder. Held in Brisbane, the Mango Mafia boys were running this as a charity event for The Animal Welfare League, and overall they managed to raise over $3,500 for them, so the tournament was definitely a success.
I was taking my Sylvaneth on their maiden voyage. With only a dozen or so casual and practice games under my belt with them, I knew this was going to be a true trial by fire. My list was;
Allegiance: Sylvaneth
– Glade: Heartwood
– Grand Strategy: Take What’s Theirs
– Triumphs: Bloodthirsty
– Season of War: Everdusk
Leaders
Treelord Ancient (330)**
– General
– Command Trait: Gnarled Warrior
– Artefact: Acorn of the Ages
– Lore of the Deepwood: Regrowth
Arch-Revenant (120)*
– Artefact: Seed of Rebirth
– Aspect of the Champion: Tunnel Master
Drycha Hamadreth (320)*
– Lore of the Deepwood: Throne of Vines
The Lady of Vines (290)
– Lore of the Deepwood: Verdurous Harmony
Battlemage (100)*
– Realm: Ghur
– Allies
Battleline
10 x Dryads (100)**
10 x Dryads (100)**
6 x Kurnoth Hunters with Kurnoth Scythes (500)**
– Reinforced x 1
5 x Tree-Revenants (110)**
Core Battalions
*Command Entourage – Magnificent
**Battle Regiment
Additional Enhancements
Artefact
Total: 1970 / 2000
Reinforced Units: 1 / 4
Allies: 100 / 400
Wounds: 105
Drops: 5
This list is mainly built around the Kurnoth Hunters using Strike and Fade. With the Arch Revenant being able to tunnel master to give them support, and the Battle Mage allowing an easier charge, the Kurnoths can charge in a wreck most things. Drycha is there as a backup Strike and Fade piece, whilst the Treelord Ancient means I can get a couple of important woods out early. With the Dryads and Lady of Vines providing some support and screens, the list plays fairly well, but really relies on everything working together (and not failing spells or charges).
Overall, my goal for this tournament was to have 5 solid games, not make any big mistakes, and to score a spot on the shortlist for painting. I was hoping to sneak into the 4-1 bracket, but I would be happy to at least get 3-2.
Round 1 – Luke – Hedonites of Slaanesh
First round I was up against Luke with his Hedonites of Slaanesh. I’d met Luke at the previous tournament I had run, so getting to play someone who I hadn’t played before is always a win, especially round one.
His list was in the Pretenders subfaction, and had a Keeper of Secrets, Sigvald, Contorted Epitome, a Lord of Hubris, and the Masque as his heroes. And they were backed up by a big unit of daemonettes, some small units of seekers, and some blissbarb archers. All wrapped up in two battle regiments for the two drop, rounded out a very nasty list.
This battleplan was Ours for the Taking, and Luke won the roll and after deployment chose to go first. His first turn was fairly straightforward, the bulk of his forces moved up towards the centre, with a unit of seekers darting out to grab each of the side objectives. He plinked me for some damage with the blissbard archers, and then annihilated a unit of Dryads with the Masque, scoring himself 10 Depravity points in the process.
My turn was straightforward as well, I needed to take at least one of the side objectives back, and I needed to deal with something in the centre. So, the Kurnoth got Wildform and teleported up the field to deal with a unit of Seekers, whilst all my ranged firepower was thrown at Sigvald. Despite Luke not giving me any temptation dice for these attacks, I managed to spike it and take Sigvald off the table.
Luke won priority going into turn two, and decided it was Go! time. His army moved up, and he got ready to crush me under a wave a daemonettes. They charged in, weathering both an unleash hell and a groudshaker, and tried to kill the Treelord with sheer numbers. However, his smart play with the Lord of Hubris was undone with a lucky stomp and the Treelord survived to hold his ground. The remaining unit of Seekers, snuck behind my lines and did some damage to the Dryads I had guarding my home forest.
My turn I planned for big things. I figured the Kurnoth would be able to hit the Blissbarbs and Keeper, whilst Drycha, the Treelord and the Lady of Vines cleaned up the Daemonettes, to take a big attrition swing. So, the Kurnoth moved up, whilst some Dryads were teleported to steal back the bottom right objective. Unfortunately, the Kurnoth failed their charge, so that left Drycha fighting the Keeper solo. Even more unfortunate, I forgot to Strike and Fade with her, so at the end of the turn, Drycha had taken 8 unnecessary damage, there was still a single Daemonette alive, and I could feel the game starting to slip.

Luke won priority again for turn three and figured that if he could clear the Treelord and Drycha, then he should be sitting pretty well for the rest of the game. The Keeper killed Drycha easily, but despite throwing the leftover Seekers, the Epitome, and the Blissbarbs shooting, the Treelord tanked it all to remain standing. The Masque did (once again) annihilate a unit of Dryads and was farming those Depravity points quite nicely for Luke.
My turn saw the Kurnoth finally make their charge, to join the party that was happening in the centre, and they were ready to party when they arrived. After the flying woodchips had cleared, the centre zone was firmly under my control, with only a couple of Blissbarbs left.
I won priority going into Turn 4 and as we were running quite low on time, we decided to math it out from there. I still had plenty of battle tactics left, and my grand strategy was a lock, while Luke didn’t really have anything left he would be able to accomplish. The big charge of the Kurnoth, combined with the resilience of the Treelord had granted me victory.
This game was a fantastic way to start the weekend, and Luke was an awesome opponent. Slaanesh is definitely in a good place now, and after the game we talked about all the other lists that Luke was keen to try. I always find that the first game sets the tone for your tournament experience, so after such a fun game, I was looking forward to round two.
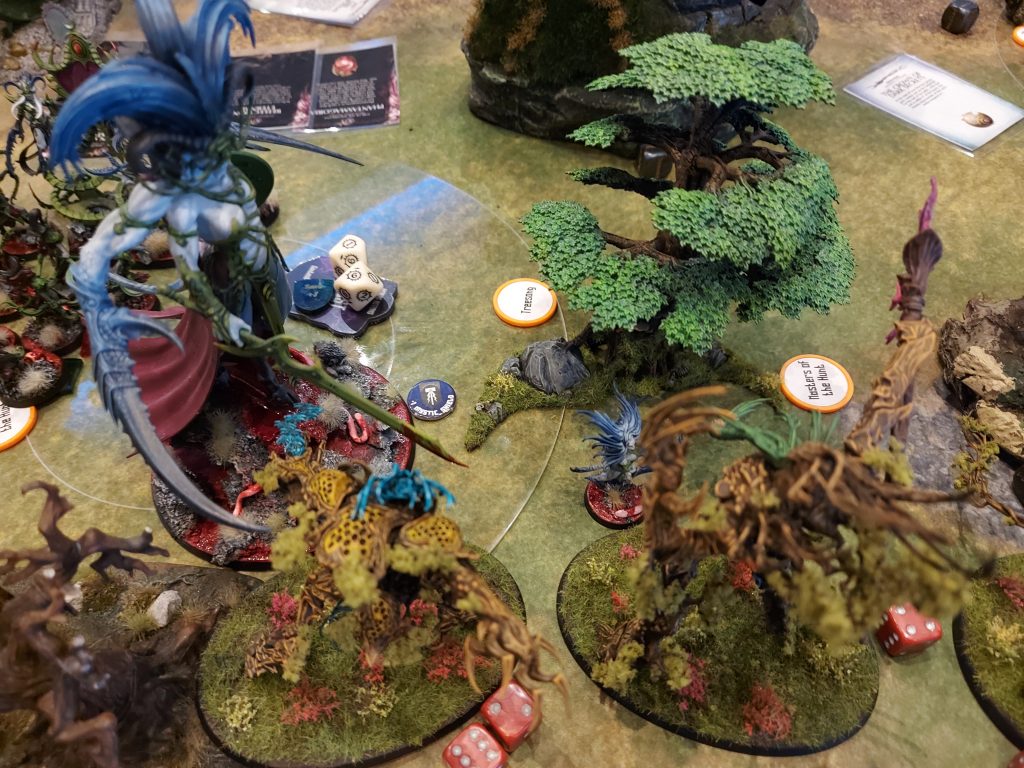
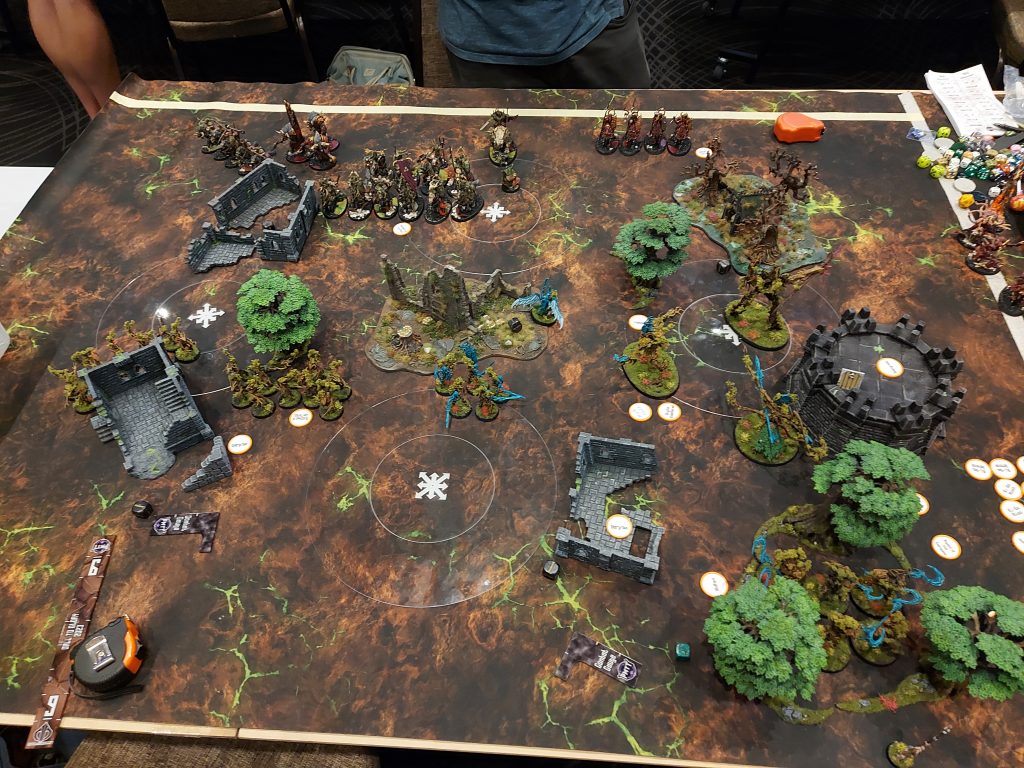
Round 2 – Creddy – Soulblight Gravelords
So hot of the first round win, I was quietly confident I could do quite well. That was until I saw I was playing Creddy. I’ve known him for years and we always end up having a ridiculously close games, no matter the game we are actually playing. But I knew that it would be a decently fun game, so I wasn’t too worried.
He was playing the new Soulblight Gravelords and had the big bad Nagash himself. Backing him up was a Vampire Lord on Zombie Dragon, 3 units of zombies, and a corpse cart. Okay, so no spells for me, and that unrendable Zombie Dragon was going to be a problem.
Creddy won the roll off for sides, and immediately chose the side with the Arcane terrain. We both deployed fairly conservatively, with both Nagash and the Dragon fully screened out by zombies, whilst I’d built my bunker around my home forest. Creddy then elected to go first and the game began properly.
Creddy’s first turn was relatively simple, Nagash cast a boatload of spells, then his whole army moved up onto the objectives. Fast and straight to the point.
My first turn was a little more involved. Creddy had sent his Vampire Lord on Dragon out on my left flank to capture that objective. I figured this was a chance for me to try and scalpel it out early and give me the attrition lead. So I tried to setup for it. The Treelord placed down a forest, but Nagash managed to stop every one of my spells, including the Wildform that I rolled 12 for (He then also rolled a 12). So I was stuck making 9″ charges then. The Treelord and the Kurnoth then teleported to get the charge, whilst Drycha moved over on my other flank to take the objective back off the zombies. The Dryads in the centre moved up to hold the middle objective and I went into the charge phase ready for action. And then disaster stuck, not only did both the Kurnoth and the Treelord fail their charges (9″ rerollable), but Drycha failed her’s as well, so I was stuck charging some Dryads into the front unit of zombies, they made their 5″ charge, and but were stuck out of position when they teleported away.

I really needed the double here, but Creddy rolled a 6 and he took the turn. Nagash threw out a ton of spells, but most importantly severely debuffed the Kurnoth Hunters. The Vampire Lord on Dragon moved up to threaten the Kurnoth, whilst the rest of the zombies shuffled around to rescreen Nagash and take back the objectives. The Vampire Lord on Dragon charged into both the Treelord and the Kurnoth, but with all the debuffs, they barely scratched him before he attacked, and destroyed the entire Kurnoth unit. Nagash also charged into the centre objective and began beating away at the Dryads trying to hold it.
It was starting to go downhill for me now, as without the Kurnoth I was going to struggle to put any meaningful damage on either the Vampire Lord on Dragon or Nagash, but I was hoping that killing off the remaining zombie units would keep me in the game points wise. Drycha tried to kill the corpse cart and the zombies, but some low rolls meant that neither really took damage. The rest of my army shuffled around to try and hold both Nagash and the Vampire Lord on Dragon in place, but after a spiky combat phase, I had lost the Treelord, as well as most of the Dryads holding the centre, and failed to really do too much damage despite wiping out a unit of zombies.
I lost priority again, but the game was already slipping away. Through his continued magic dominance, Nagash killed Drycha and severely damaged the Lady of Vines, allowing her to be finished off with the Dragon’s breath attack. The zombies and corpse cart, that Drycha failed to kill last turn, moved into the zone to steal it back from me. Then Nagash finished off the Dryads holding him in the centre, and turned all eyes to my remaining forces.
I didn’t have much left, but if I could kill the Zombies and Corpse cart, then I might be able to reclaim some form of dignity. But despite charging the Arch Revenant, the Tree Revenants, and the remaining Dryads into them, it wasn’t to be found. After my abysmal dice, we called it and tallied up the score.
A bit disappointing but those are the dice. We both agreed afterwards that if I had made some of the charges on my first turn it may have gone differently, but after that bad luck, I really needed Creddy to make a big mistake for me to get back into the game. But he didn’t, and after his spiky dice with dealing with the Kurnoth and Treelord in one round there wasn’t much I could do. All I’ll say is a 3+ save is amazing if you can roll 3’s.
Round 3 – Brendan – Slaves to Darkness
Okay, shaking off the big loss to Nagash, I get matched up against Brendan for Round 3. I’ve only played him once before, but that was a fun-ish game (his Stormcast dragons ignoring all my spells was decidely not fun) but he was good to play against so I was looking forward to a rematch.
His StD was in the Empty Throne, and had a big unit of Nurgle Varanguard as his hammer unit. Backing them up was another big Nurgle Knights unit with the banner, some Khorne Knights, a Lord on Karkadrak, some Theridons, a couple of Sorcerers and a unit of Marauder Horseman.
He hadn’t played against Sylvaneth with their latest book, so the first 10 minutes of the game was spent by me thoroughly confusing him with all the special rules. I almost forgot to mention Strike and Fade, and that would have been a massive error, but remembered about halfway through deployment.
We had the same number of drops, and when I won the roll off the choice was going to be mine. I deployed in my usual bunker, but with two units of Dryads off on my left flank. I was hoping that the 20 Dryads, combined with a Wyldwood, would slow Brendan down enough that I could just focus on the right-hand side of the board. Brendan had his army spread out through his deployment, with his big unit of Knights and Varanguard in the centre, with the Theridons and the small unit of Knights towards each flank.
I choose to go first and decided that the Varanguard needed to die, and they needed to die now. If I let them get all setup then it they would become even harder to deal with, so an early alpha strike was the best option. I was able to deploy Drycha in range to shoot, and with the Treelord summoning a tree in the exact spot I needed it, I was going to be able to get the Kurnoth into them as well. The Arch Revenant tunnelled into the middle piece of terrain to get the +1 to wound buff on where the Kurnoth would need it and it looked like everything was going to go according to plan. And then the Kurnoth made their charge, and I breathed a sigh of relief. Even with the Treelord failing his charge, I was still confident that the Kurnoth would be able to do some proper damage. They didn’t let me down, even with the debuffs and All-Out-Defense, they were still able to bring 25 attacks at 2+/3+/-4/D2, which is just a sweet profile. After all the dice were tallied up, they had managed to wipe out the Varanguard to the wound. And with a Strike and Fade, they would hopefully be repeating that next turn.
Brendan’s first turn started slowly, as he was still in shock from the carnage that the Kurnoth had just caused (and rightfully so). But he gathered his senses, and correctly figured that if he didn’t commit, then it was just going to keep happening. Both units of Knights and his Chaos Lord all moved up to threaten Drycha and the Treelord, whilst the Marauder Horseman and the Theridons moved over to wreck some Dryads. With a massive charge, the Khorne Knights and the Chaos Lord got into the Treelord, whilst the Nurgle Knight got into both the Arch Revenant and Drycha. Brendan’s dice were less than ideal, but he managed to severely injure both Drycha and the Treelord.
We rolled out priority and I won and took it. If I could have a repeat of the Kurnoth this turn, I could possibly seal the game right here. The Arch Revenant retreated out of combat with the Nurgle Knights and held the right-hand zone, whilst the Treelord stayed in against the Khorne Knights. The Kurnoth got buffed up again and teleported 9″ away from the Nurgle Knights. After Drycha did a little damage with her shooting, the Kurnoth charged in and tried to finish the job. Drycha attacked first, as I was quite worried about losing her, so I was able to Strike and Fade with her to get her out, and as the Kurnoth charged the edge of the Nurgle unit, I was less worried about their survival. Thankfully the Kurnoth did their job and destoryed the Knights, it was a close as their banner and mark combined made them ridiculously tanky. Unfortunately, the Treelord died as the Khorne Knights brought him down, but he did kill the Chaos Lord before he fell.

Brendan was starting to feel like his back was against a wall, so he went for some big plays. Firstly, one of his Sorcerer’s snuck through the central ruins to steal my zone, whilst the Khorne Knights and the Theridons both charged in to get some work done. Unfortunately, whilst the Theridons only fluffed their attacks, the Knights only managed a single kill before being destroyed by the Kurnoth.

Brendan won the next turn’s priority, and tried to clear the Dryads on the left-hand objective. Unfortunately his dice had other plans and he barely managed to kill the small unit with his Theridons, so we called it after that.
This game perfectly showed what was possible if my dice work. The charges working, combined with the plethora of buffs I was able to get out, meant that I was able to hit and remove entire sections of Brendan’s force without reprisal. Taking out the two biggest threats with almost no chance at retaliation would rattle even the most veteran players, and Brendan took it like a champ, and stayed in to keep rolling with the punches. I don’t even think Brendan really made any mistakes with his gameplay or positioning. I set the tempo of the game early, and then kept the pressure on to never allow him to catch up. It’s always a rough game when you get so far behind so early, but I’m keen to play Brendan again to see him settle this with a tiebreaker.
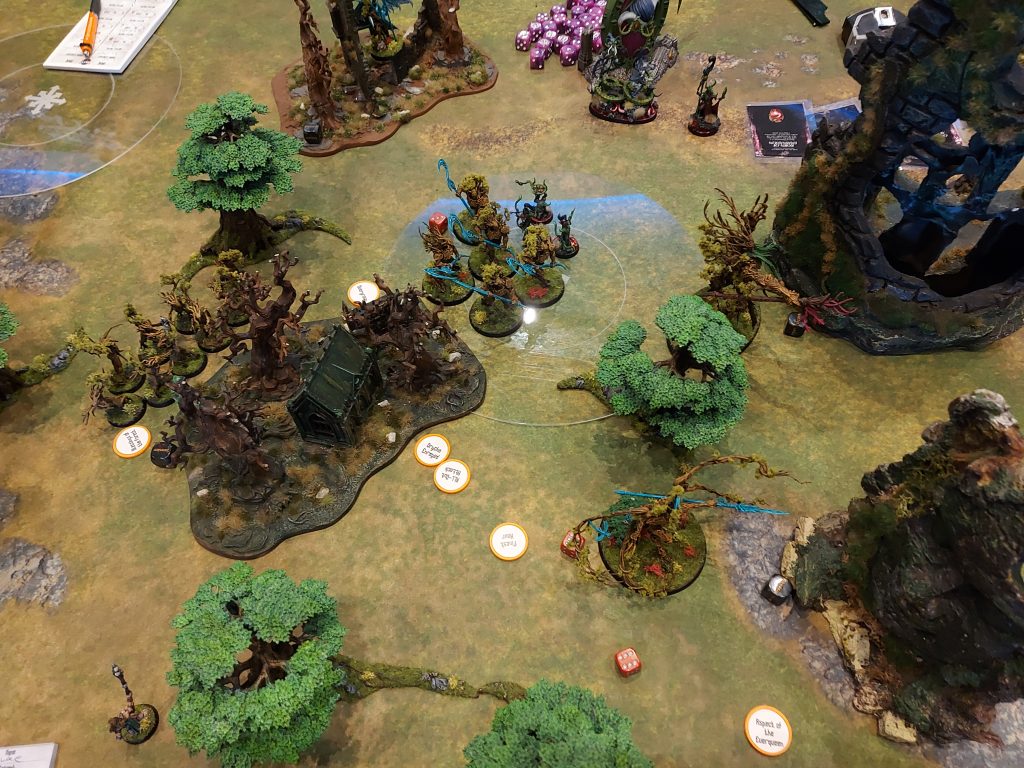
Round 4 – Johan – Big Waagh
Okay, first up day two is Johan, another guy I’ve only played against once. That game I thoroughly beat him, but it was his first tournament (ever), and I’ve seen him do fairly well at plenty of other events, so I knew this wasn’t going to be a repeat of our last game.
His list had a Mawcrusha, a Weirdnob Shaman, a Wurrgog Prophet, 2 Warchanters, 1 Swampcaller Shaman, then two units of 10 Brutes, a little unit of Ardboyz, then a big squad of Boltboyz for some ranged firepower.
We were playing Prize of Gallet for this mission, and as Johan had 11 drops, I took first turn.
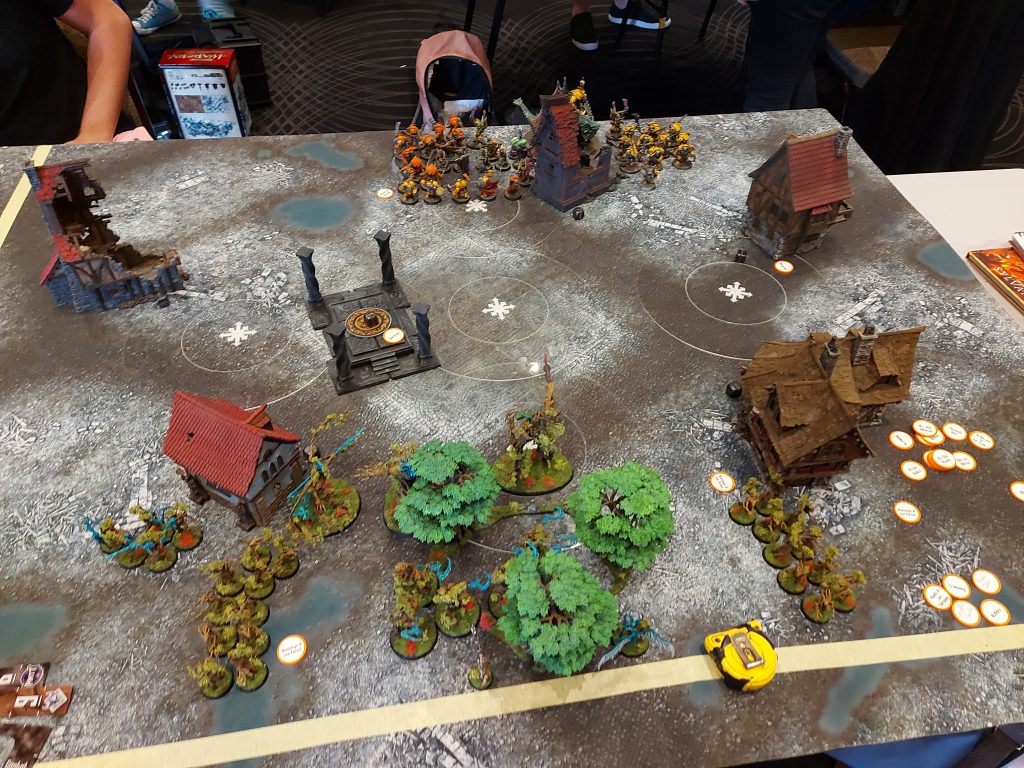
I knew the two biggest threats early were going to be the Boltboyz and the Mawcrusha, so I endeavoured to try and limit them fast. Johan had done a fantastic job screening out the Mawcrusha, so I couldn’t put any damage on him, but the Boltboyz were close to his right flank, so Drycha would be able to put some shots into them, charge the Brutes, then Strike and Fade away. So that’s what I setup for, the battle tactic was Harness the Spirit Paths, Drycha was embittered, the Treelord put down a forest where I needed it, and my spells mostly worked, with Drycha getting Wildform which was the most important. My army then moved slowly up the field, with the Lady of Vines holding the centre with plenty of Dryads, whilst the Treelord and Kurnoths staying well out of range of those Boltboyz. Drycha teleported to where she could get her shots in, and then started the damage. After the shooting phase, I’d only killed a couple of Boltboyz, as Johan had wisely used his once-per-game ward save to keep them alive. Drycha then charged into the Brutes, killed three of them, then bailed out to setup for the next turn.
Johan then countered with a relatively passive turn (compared to what Orruks can do) and mostly just setup to bring the pain later. The Wurggog half killed a Dryad unit with his spells, whilst the Boltboyz put some hurt on the same unit and another. This allowed the Ardboyz to move up and take control of the centre objective, along with the Wurggog, meaning we were tied for points.
I won the roll for priority going into round 2 and took it. I figured I had another turn of softening everything up before Johan fully committed and that the extra damage might be key. Unfortunately for me, Johan also plays Sylvaneth, and so fully understood how to limit my teleports. I wasn’t going to be able to get any big hitters onto either the Mawcrusha or the Boltboyz, so I settled for hitting the big unit of Brutes and solidifying my hold on the centre. I put a couple of points of damage on Wurgogg, as I knew the deathstare would be coming next turn, and dropped an Ardboy, and then got the Kurnoth Hunters into the big unit of Brutes. After a quick combat phase, my Kurnoth were back safe in my home forest, leaving six brutes in pieces.

Johan’s turn two is when he started to damage my army properly. Firstly, the Wurgogg unleashed his deathstare and promptly blew himself up, but not after putting 5 damage onto Drycha. With some accurate shooting from the Boltboyz, the bitter spirit was killed in the shooting phase, which mean the Ardboyz charged into the centre without incident but failed to do too much damage through the Dryads many buffs and debuffs. The Mawcrusha also moved up aggressively, and charged into the Tree Revenants, with Brute support, and thoroughly destroyed my left flank.
Priority went to me again, and now everything was properly committed and engaged. I had planned on getting the Kurnoth into the Mawcrusha, but with where I could place an extra forest, and with Johan’s excellent positioning, he had locked me out. I decided instead to commit them to clear my right flank and send the Treelord into Johan’s backline to tie up the Mawcrusha. Unfortunately, these plans were spoiled by the fact I failed all the important charges. The Kurnoth failed (with a reroll), the Treelord failed (with a reroll), so I ended up panicking slightly and charged the Arch Revenant into the Swampcalla Shaman. He whiffed against the shaman and was nearly killed for his efforts. My battle tactic that turn was Eye for an Eye, and with all the failed charges, meant I was only scoring a single victory point for the turn.

Johan’s turn, on the other hand, went beautifully for him. He sent the Mawcrusha back to deal with the Treelord, whilst the yellow Brutes charged into the centre to help the Ardboyz clear out the annoying Dryads. The orange Brutes locked of the other big unit down, whilst the Swampcalla finished off the Arch Revenant. After all the dust had settled, Johan had cleared my Treelord, the centre zone, and had begun to really lock the game down.
Once again, I won the priority, which was good because I didn’t think I’d be able to come back if Johan scored the double turn. With my few remaining units, I planned on clearing the centre zone, and hopefully forcing the Mawcrusha to face off against my Kurnoth. I did fairly well with that plan, the Kurnoth made a big charge, which meant they were able to steal Johan’s home zone from the single Boltboy that was holding it, and they cleared the centre zone with some assistance from the Lady of Vines.

Johan’s counterattack was direct and to the point. His Mawcrusha moved over and charged into the centre, and combined with some Boltboy support, tried to remove the Kurnoth Hunters, but an All Out Defense, combined with some crucial ward saves, meant they only lost two models. His dice also let him down with the lone Brute fighting the Dryads, with both fighting to a standstill.
With the final priority roll, I won and took it again to try and sneak in a victory, but to no avail. Johan had given me no good options, and whilst I was able to kill the Mawcrusha with the Kurnoth Hunters, he had managed to lock them in place to stop me killing his remaining Warchanter and Boltboyz in his territory. This stopped my Grand Strategy, and in his turn the lone Brute retreated to secure his, and secure him the game, 17-21.
This was another fantastic game, with a disappointing ending. Again, a big turn of failing charges meant that I had almost half my army sitting around doing nothing, and that turn would’ve made a huge difference in the end. But those are the dice, so I can’t complain too much. Johan played excellently, with locking down most of my teleports and really controlling the tempo of the game. I don’t feel I made a mistake during the game (except not charging the Arch Revenent into the Ardboyz), but I felt that I needed Johan to make a big mistake for me to get back into the game proper, but he kept his cool, played smart and didn’t make any mistakes allowing him to secure the win for himself.
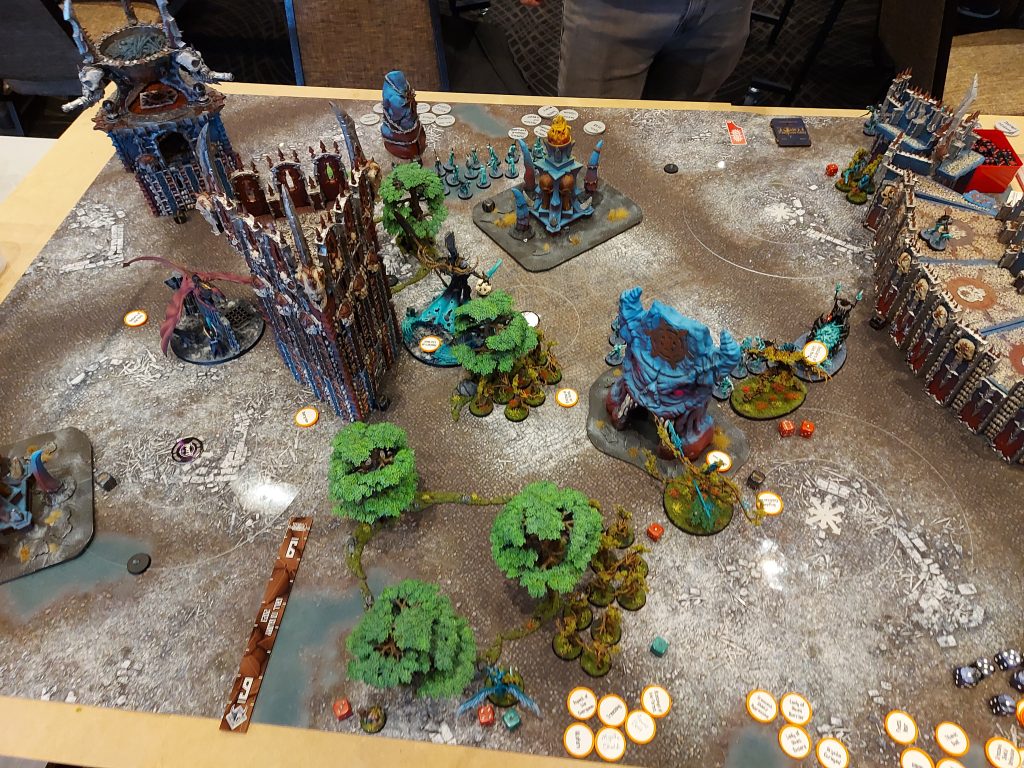
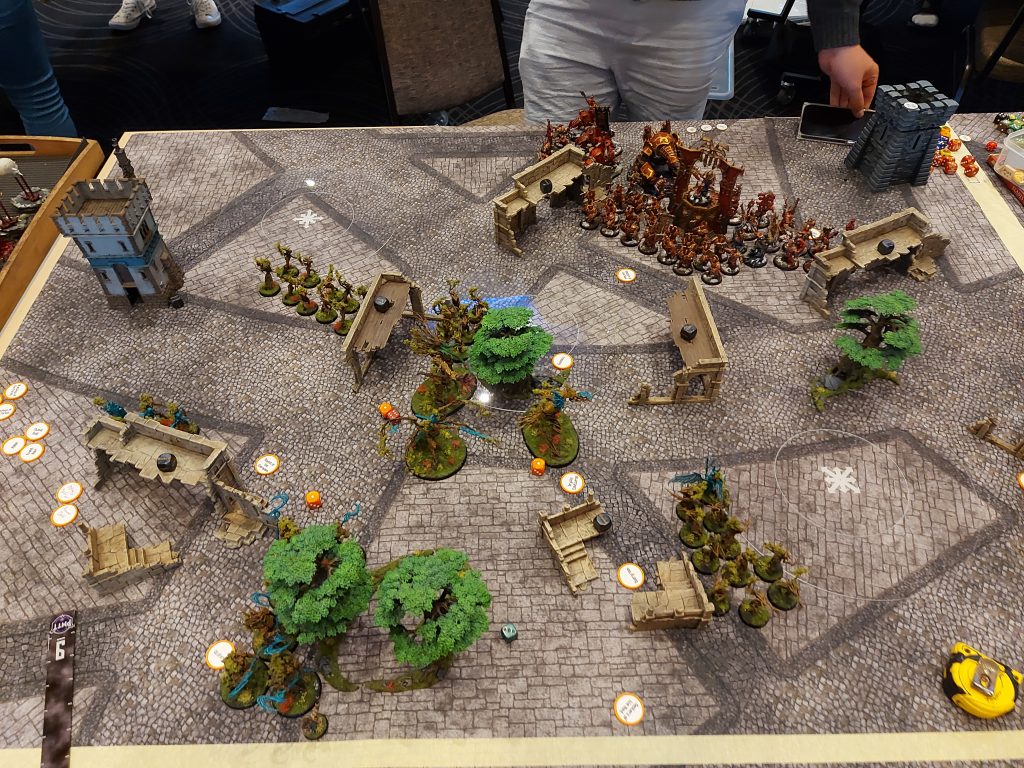
Round 5 – Gammie – Blades of Khorne
The previous round was a bit disappointing, as I was really hoping to sneak into the 4-1 bracket, or at least ensure I made the 3-2 bracket. So, it looks like the pressure is on, and that pressure will be brought by Gammie with his brand new Khorne list. I’ve played Gammie a couple of times before, and he is an absolute gentleman, so this was going to be a good way to round out the event, no matter the result.
His list had an absolute ton of stuff I had never played against, a couple of Slaughterpriests, a Bloodstoker, a Bloodsecrator, and the Realmgore Ritualist were the heroes, and they were leading a massive unit of Bloodwarriors, a big unit of Skullreapers, two units of Skullcrushers, some Bloodreavers, with a Skull Cannon in support.

With less drops, I chose to go first, I figured that I needed to remove some of Gammie’s units before he was able to overwhelm me with just the sheer volume of attacks he could put out. Tthe Treelord placed down some trees, some Dryads moved up to screen, the Battlemage cast Wildform, the Arch Revenant tunnelled up, and the Kurnoth were sent through the trees. My target was the Skullcursher unit on the right flank, as I was able to fit the Wyldwood down close enough to Strike and Fade out. Drycha moved up to shoot down a couple of Blood Warriors, then the Kurnoth went in, did their thing, then bailed out, leaving 3 dead Skull Crushers in their wake.
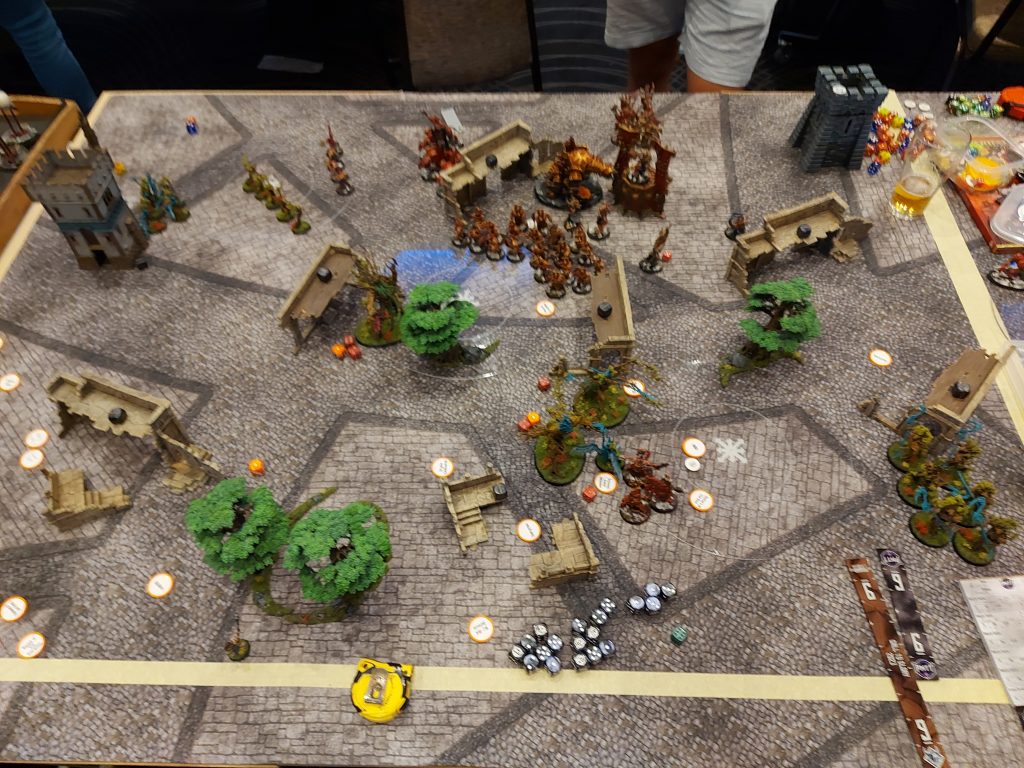
Gammie’s first turn was a lesson in the power of the new Khorne book. He started by putting out the Khorne Skulls, which were going to be a massive threat with all my wizards. He then threw out some mortals wounds and dragged my front unit of Dryads into combat with his Blood Warriors. In the movement phase, the remaining Skull Crushers and the Bloodreavers took the left zone, whilst the Skull Reapers moved up to deal with the right zone. A big charge from the Skull Reapers saw them make it into the Arch Revenant and the Dryads, with the Dryads promptly destroyed in a vicious flurry of attacks.
I won the priority roll and took the turn. I was confident my Treelord would be able to last at least one combat phase against the Blood Warriors, so my top priority was dealing with the Skull Reapers. I tried to get Wildform on them, but Gammie stopped it with some Blood Tithe, and then Drycha rolled an eight, forgot Treesong, and all my wizards took a bucket of mortal wounds from the skulls. As the Kurnoth were stuck making the 9″ charge, I moved both Drycha and The Lady of Vines over to support if they failed their charge, whilst the Tree Revenants teleported to steal back the top zone. Most of my shooting was focused on the Blood Warriors, whilst the Treelord killed a couple of the Bloodreavers. The Charge phase arrived, and my Kurnoth promptly failed, which meant both Drycha and the Lady of Vines went it. After the dust had settled, Drycha had taken a few wounds, but the Skull Reapers were reduced to three models.
Gammie’s turn two was started slowly, with some bad luck with his prayers. Then Skull Reapers retreated, whilst the Blood Warriors pushed up, along with the Skull Crushers. The Skull Cannon chipped the Treelord a bit more, and the Blood Warriors charged in to finish the job. Turns out a 3+ unrendable save isn’t that great against an opponent who rolls literally buckets of dice. The Skull Crushers also cleaned up the Dyrads, rounding out a relatively successful turn for Gammie.
Priority comes again and I win it again. I take it, as if I didn’t that mass of Blood Warriors in the centre would be crashing into my remaining heroes. Gammie rallies back a couple of Skull Reapers, as I elect not to cast any spells, as the threat from the skulls is much too high, so I move my heroes around so that the Arch Revenant can support the Kurnoth in the centre, leaving Drycha to deal with the Skull Reapers, and the Lady of Vines charging off to try and kill some of Gammie’s heroes. The Kurnoth get teleported through the forest, and actually make their charge into the Blood Warriors. As the Kurnoth wipe the Blood Warrior unit, killing the last model with their mortal wound from the pile in, and Drycha manages to kill all the Skull Reapers, the Lady fluffs and leaves the Slaughterpriest alive, and very much pissed off.
Gammie’s turn three starts with an onslaught of prayers, but Gammie’s luck is not with him, and a lot go unanswered. The Skull Crushers move over to confront the Lady of Vines, whilst the rest of his heroes fall back to fight the Tree Revenants that attempted a sneaky assassination. The Skull Cannon lines up a Kurnoth and chips another one away, whilst the combat phase see a big return, with no real damage being taken by Gammie, and both the Lady of Vines and the Tree Revenants wiped out.
Gammie steals the priority for turn four, and eyes the centre of the table. Everything is focused on the Kurnoth this turn, and the combined attacks drop another one, bringing the unit to three.
The Sylvaneth counterattack is really starting to lose momentum as very little damage is done. Drycha fails her charge, whilst the Kurnoth grind it out with the Skull Crushers, killing one of them for no losses.
In the final turn, we start crunching numbers and determine that this is going to go down to the wire. Drycha lines up her shots and manages kill one of Gammie’s remaining heroes. She then goes for a big charge, she needs to kill both of Gammie’s remaining heroes to try and stop his counter play. She unfortunately leaves one alive, but the Kurnoth manage to reduce the Skull Crushers to one model, whilst also being reduced to one model.
Gammie’s final turn he goes for a last ditch play to score points and tries to desecrate the central ruin. Unfortunately, he needs to get bodies on the objective, if his dice fail to kill the remaining Kurnoth, so they are moved quite close to the growing combat. The Skull Cannon fluffs its shots, so charges in and fluffs its combat as well. Because it charged in closer than the Skull Crusher, the remaining Kurnoth champion is able to pile away from the Skull Crusher and slays the Blood Reavers, causing Gammie to fail the Battle Tactic.
Tallying up at the end, the score ends up 23-20, with a narrow win to the Sylvaneth. Some horrible dice in the last turn meant that Gammie wasn’t able to nail home the final points to take it out.
Unfortunately, this game was marred by bad dice, Gammie didn’t really do anything wrong, made smart plays, utilised his rules, but his dice let him down in the end. I felt we were both in the game for the majority of it, but in the last couple of turns Gammie’s dice just refused to play ball, whilst mine were apologising for their earlier slacking off.
So, I ended the event on a 3-2 overall. Not a bad result, I was pretty happy with how I played, it was only really dice that let me down at a few key moments. I definitely found the games a lot closer than I was used to, and I definitely need to get some more repetitions with them to make sure I don’t forget anything major. There wasn’t a shortlist for the painting nominations, but I managed to pick up second in the overall voting for coolest army, so I’m pretty happy with that as well. Overall, it was a fun weekend, and I achieved most of my goals, so I’m chalking this one up as a success.
Until Next Time,
Henry